
Artistic Fusion: Ecoprints and Fabric Collage
This is a free tutorial.
It shows one way to use a technique.
If you want deeper guidance and finished projects, start here →Embellished Ecoprints Course
I’m obsessed with finding new ways to use my ecoprints.
The papers that are the result of ecoprinting on paper are perfectly not perfect. I love the organic way the water and colors flow on the paper. The only thing I can control is the kind of flowers and leaves I use and where I place them on the wet paper.
But I can make only so many greeting cards with these papers. They are small (about 4x6) and they can be framed as art on their own, too, but I think there must be other ways to show and enjoy them.
I really want to enlarge the best ones.
I’ve scanned them and enlarged them to be able to print them out on my computer. I’ve made printable papers from them.
I’ve used them as background for collages and pages in my journal.
Next step?
I’m using one of my favorite papers of ecoprinted cosmos, coreopsis and embellishments as the inspiration for a larger fabric collage. I plan on entering this piece in a show in September.
Here’s the ecoprint on paper:
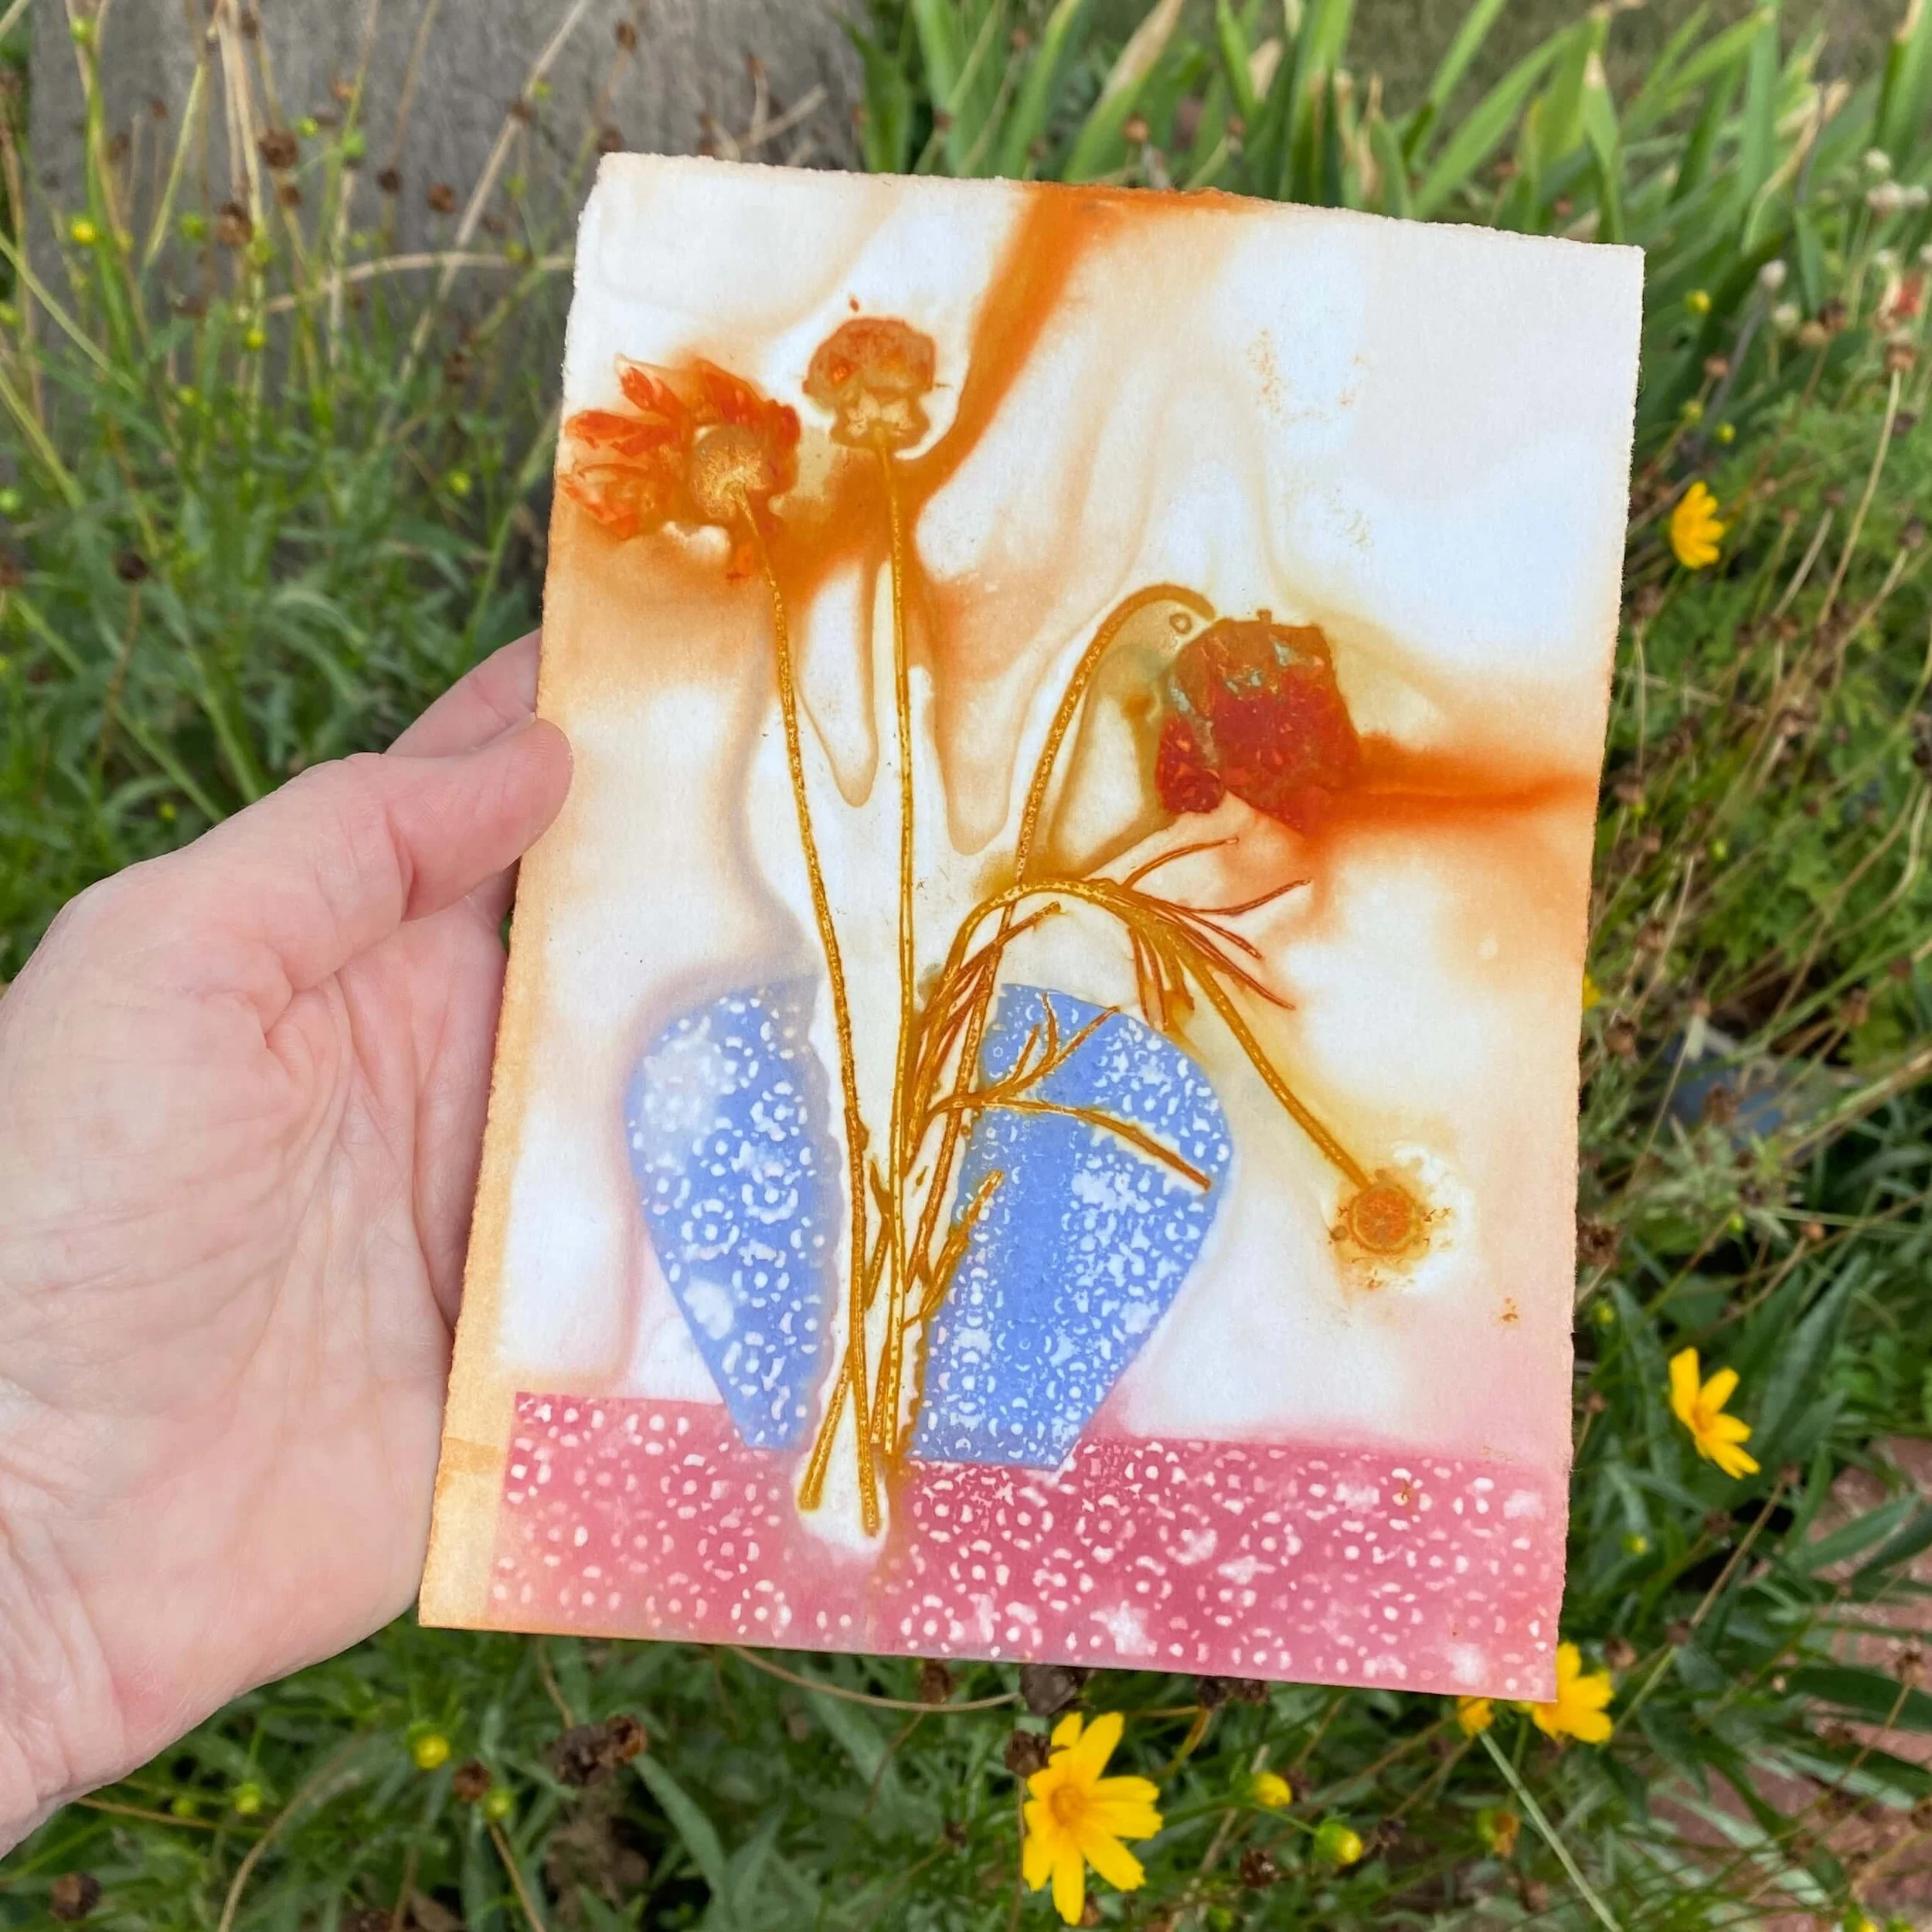
Original embellished ecoprint
With this as my inspiration, I sketched the design on paper the size of my cradled board for the show. It measures 12x12.
I like the split vase and would like to make that part of my final piece. The split in the ecoprint was the result of adding colored paper to the “bundle”. (I have a waitlist for “Embellished Ecoprints” course to show you how to add extras details to your ecoprints on paper.)
I made a copy of this sketch and cut it up to use as a pattern for cutting my fabric.

Sketch made from my original ecoprint
The Background
My concept is to put my flower vase on a table in front of a window. This will also help make my finished piece larger than the original ecoprint.
The background paper is tea bag paper.
I used a rusty tin can to make the circular marks to represent the sun on the tea bag paper. Then I used watery acrylic paint to color the sky.
The window
The first time I placed the window mullions, I used a dark red trim. But as you can see, it was too much.
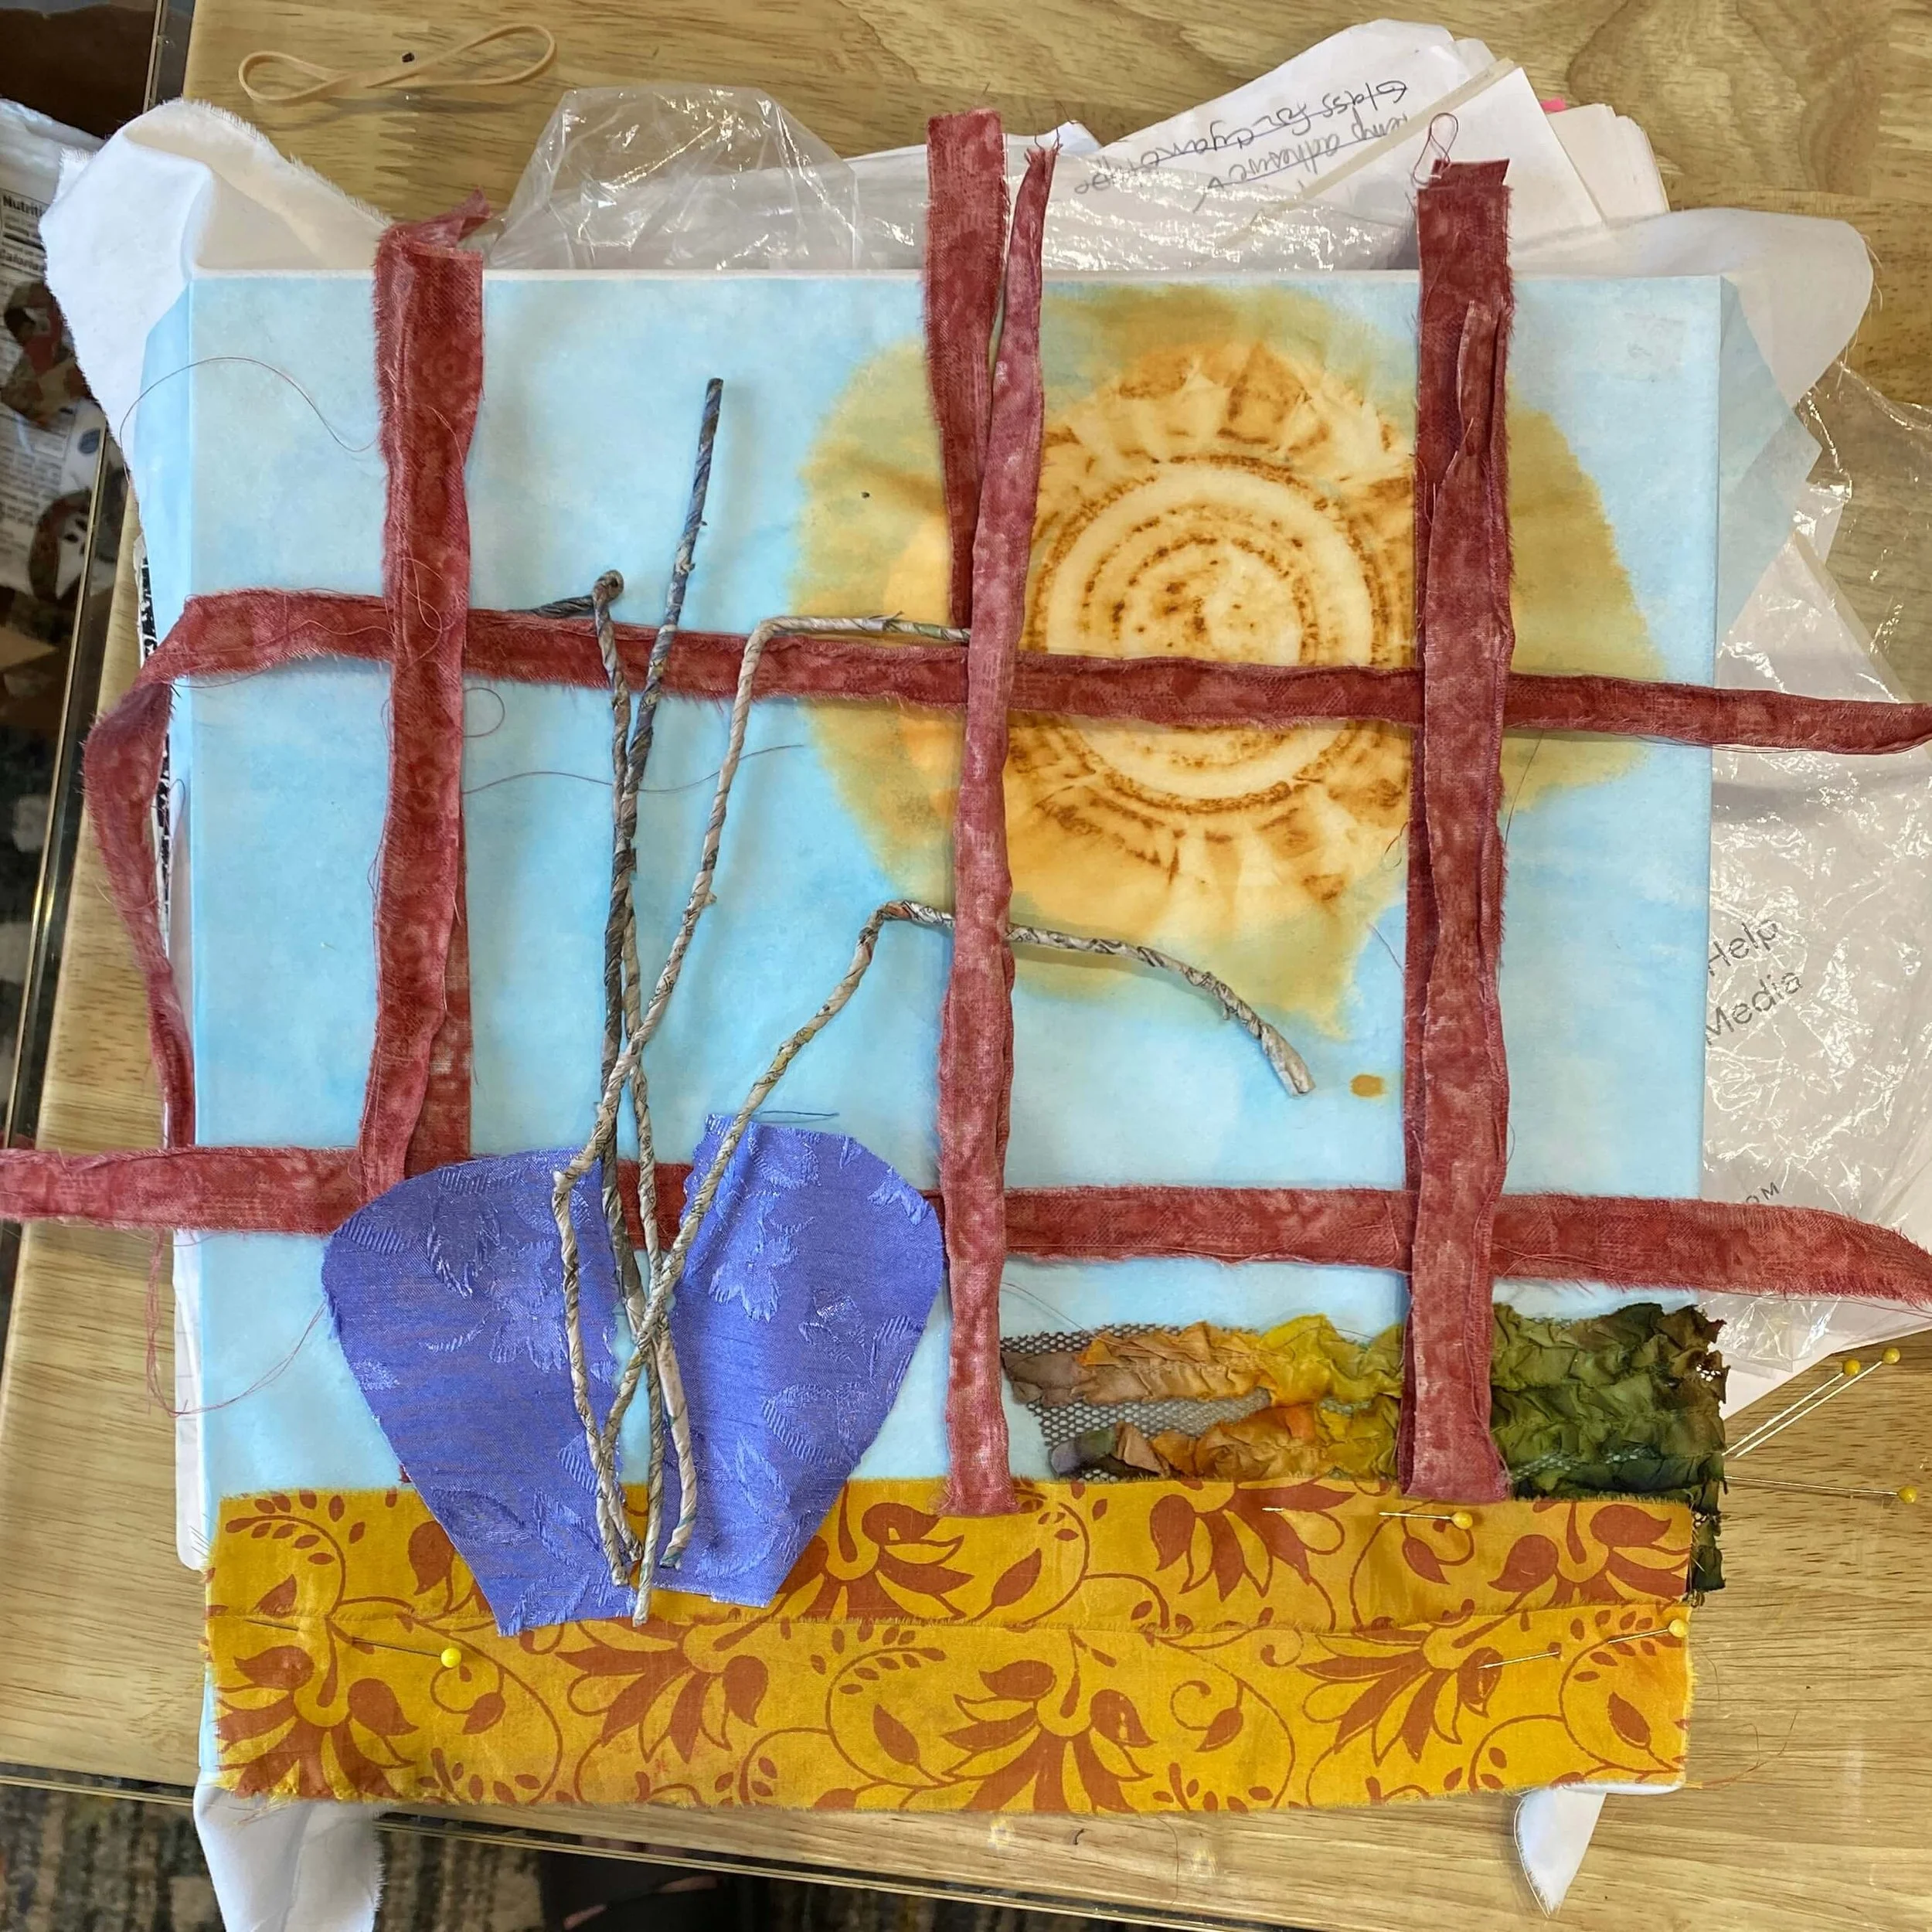
Layout with red mullions
You can also see I added some greenery outside the window, but I think it looked clunky. I like the table cloth under the vase. It has just the right color and pattern scale. I’m keeping that.
New Mullions
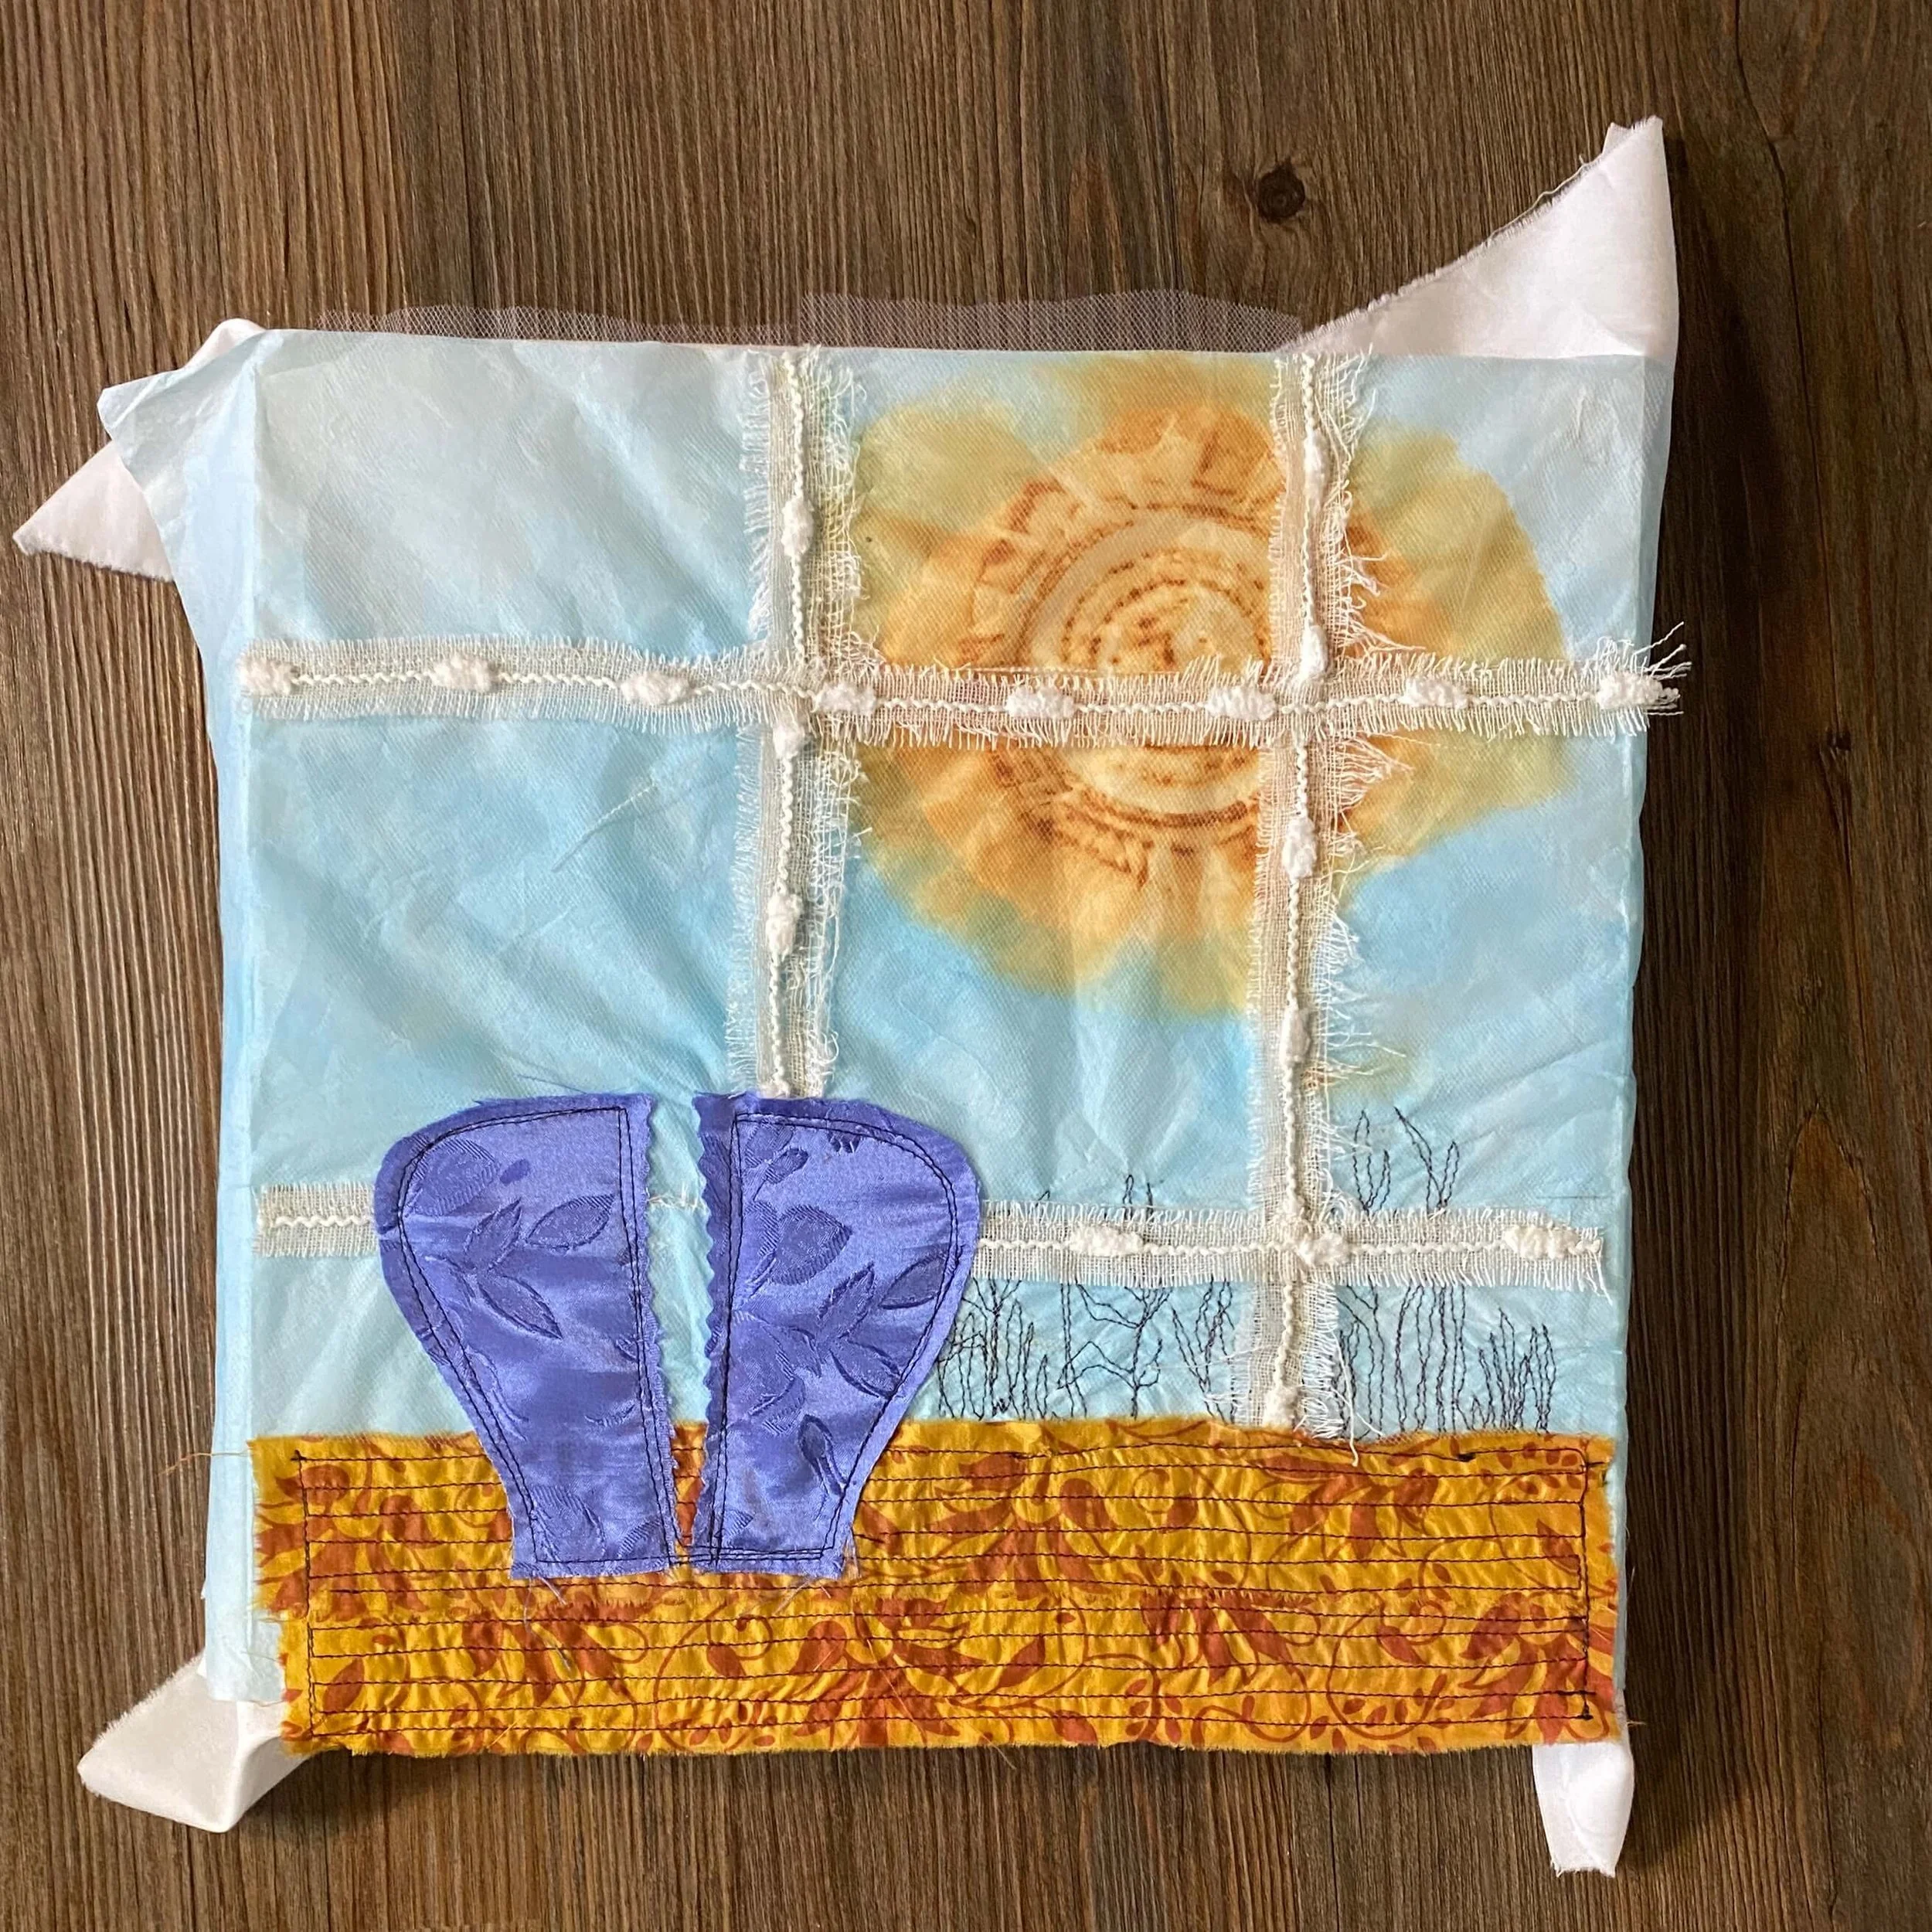
Layout with white mullions
I liked the white textured strips as mullions. They were torn from some drapes I bought at Target that were too long.
You can see that I used free-motion stitching for plants outside the window instead of the clunky green trim.
I also added rows of machine stitching on the tablecloth to add some weight to the bottom.
Something you can’t see very well is a layer of pale pink tulle that is the glass behind the mullions. Why did I add that?
I thought the “outside” was too defined and hope that the tulle softens it. I’m not sure it made much difference, but it’s stitched down.
Flowers
The flowers play an important part of this story. I wanted them to have a natural “flex” in the stems. I could have used thin wire and wrapped them in fabric, but I have a bunch of twisted newspaper that bends and curls. I felt like that would add the perfect “movement” to the stems. I wrapped them in a green/yellow batiste fabric.

Twisted paper to become stems
The flowers are made from a man’s necktie. The fabric is reversible and I liked how they look when formed into flowers.

Red flowers made from man’s necktie

Finished fabric collage
Here’s the final result. What do you think?