
My Current Ecoprint on Paper Process (2026)
In this tutorial I'll show you exactly how I ecoprint on watercolor paper using flowers and leaves, from preparing the paper to opening the finished bundle.
Let me show you what just came out of my skillet: five pieces of watercolor paper, each one printed with the shapes and colors of real leaves and flowers.
Three are warm red, rust and gold. The other two lean toward blue-green. They came from the same stack, steamed at the same time.
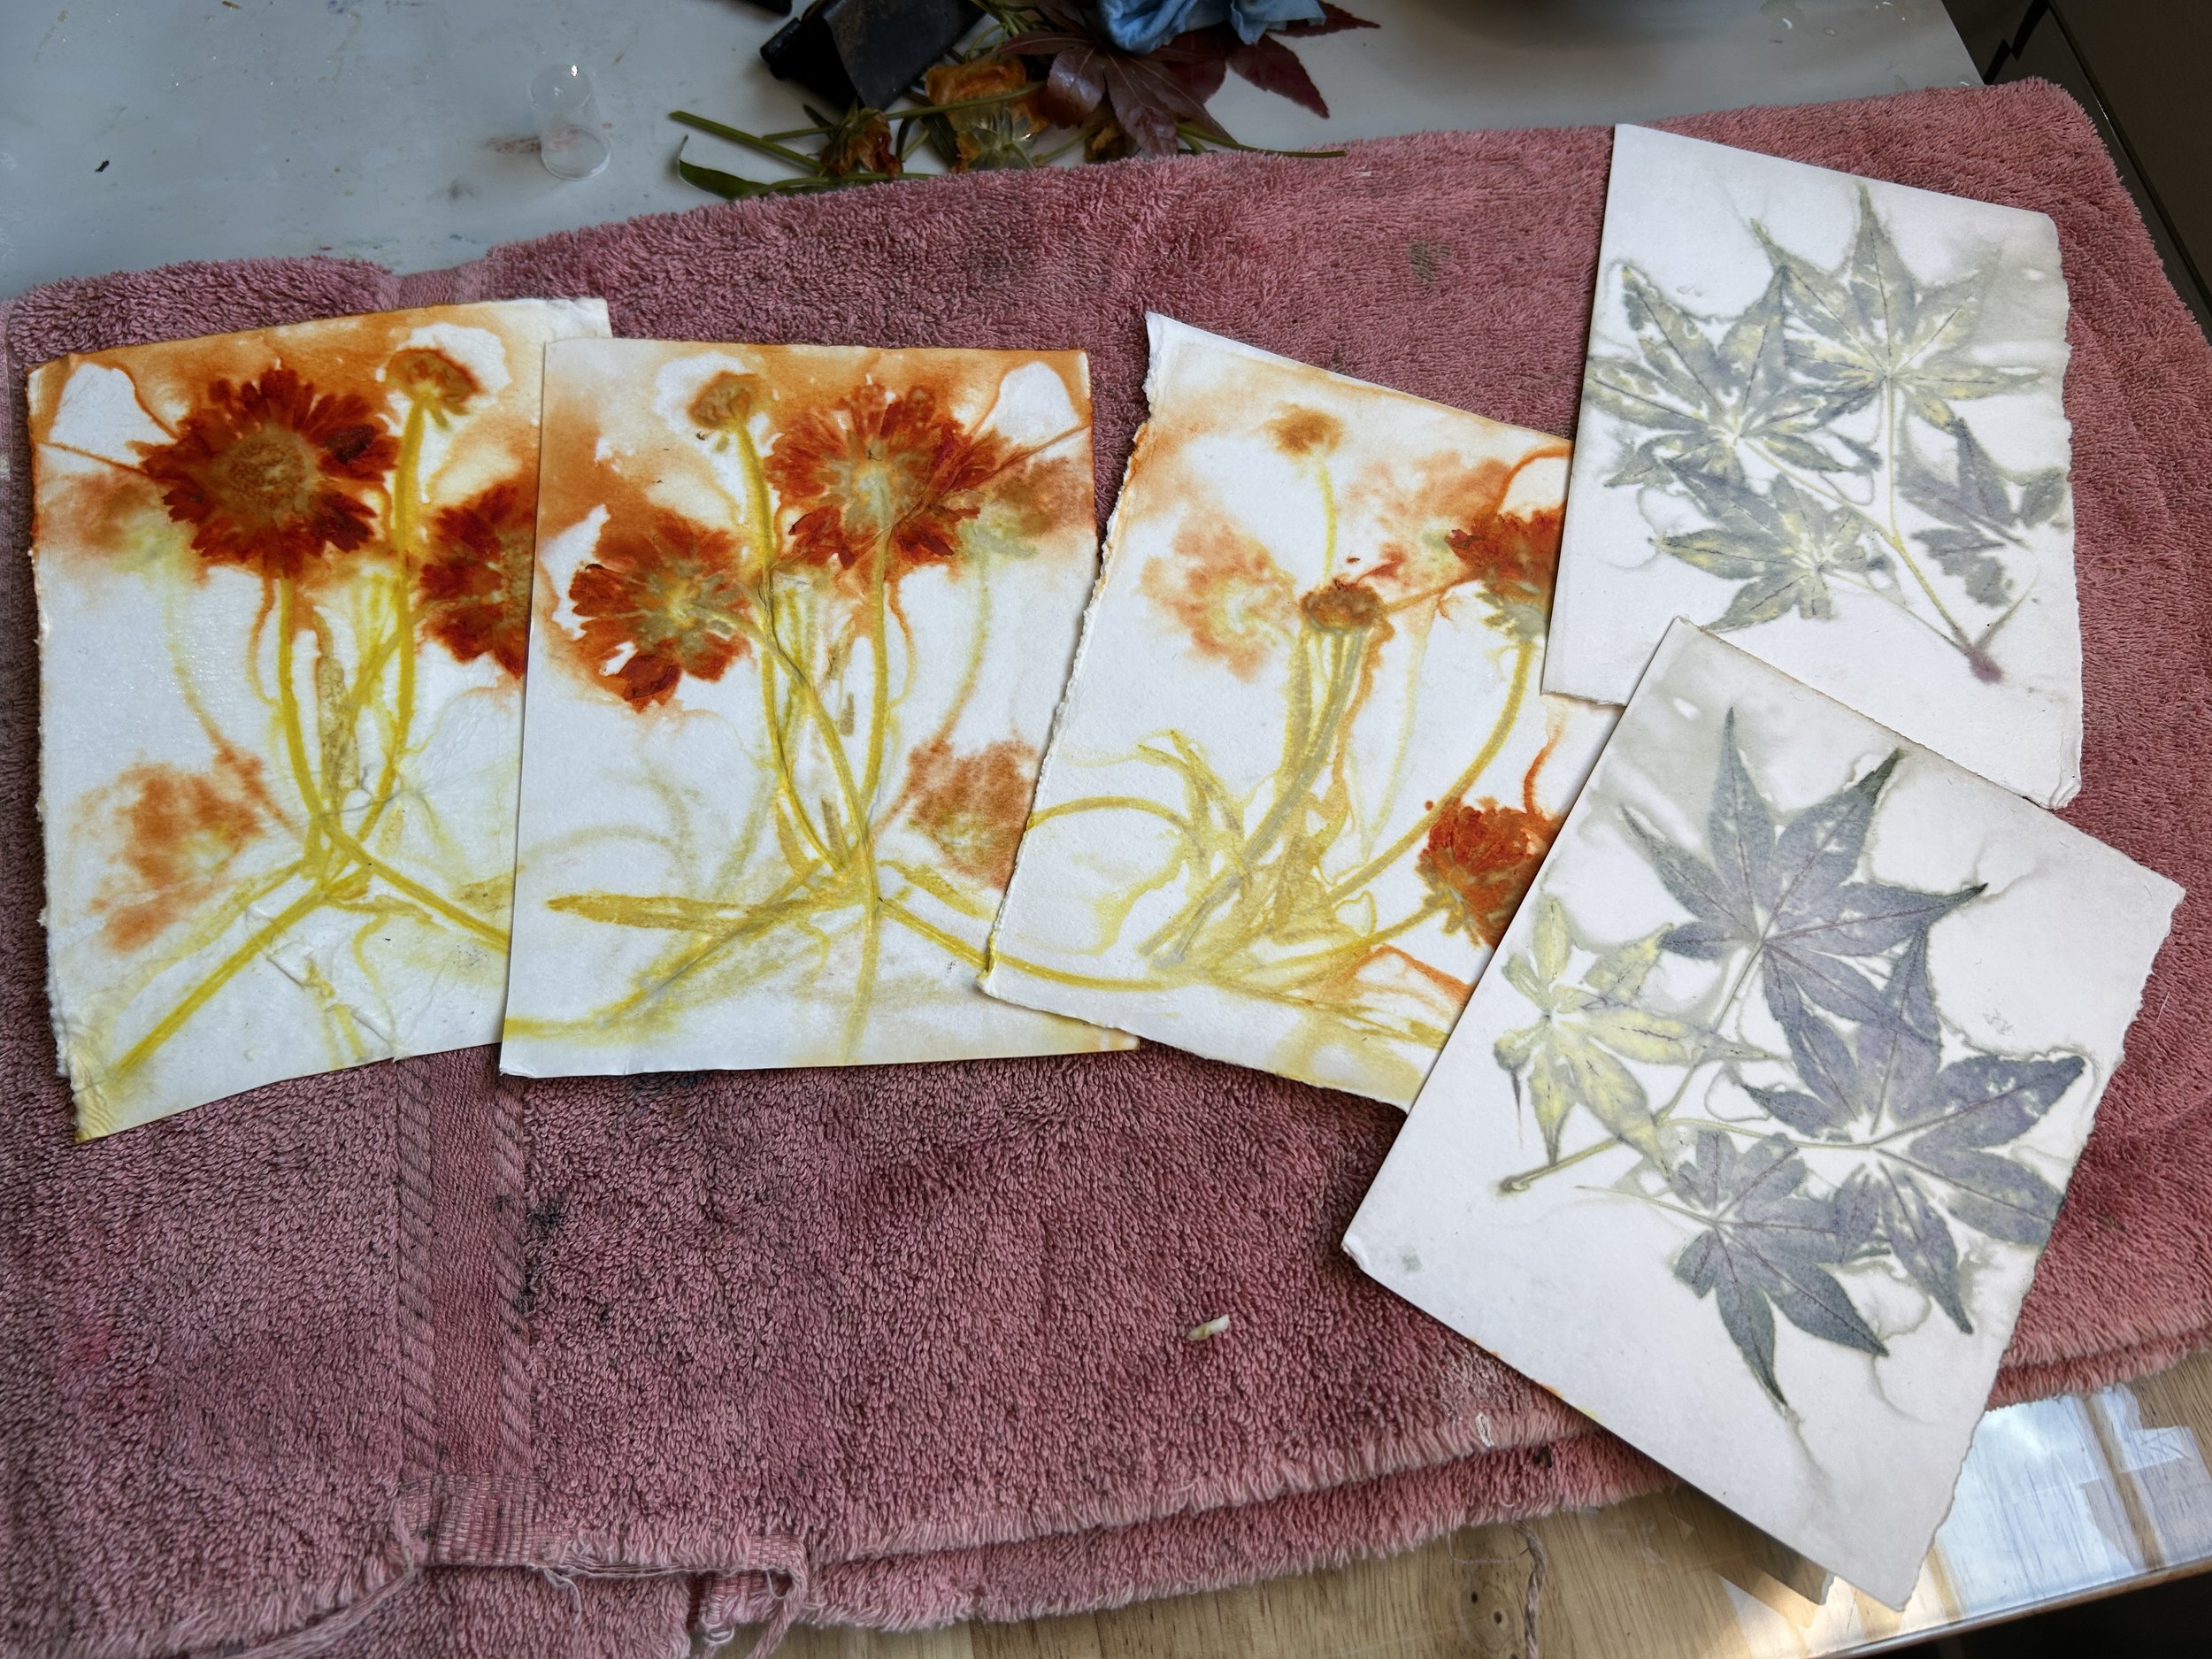
I used coreopsis flowers and Japanese maple leaves
That's ecoprinting. And it surprises me every single time.
Here's the thing about my process — it doesn't require a lot of complicated equipment.
I use an electric skillet I found at a yard sale, porcelain tiles from the home center store, and flowers I grow or pick myself. That's it.
If you've been curious about ecoprinting but thought it was too involved to try, I want to show you otherwise.
What You'll Need
Watercolor paper - 140 lb works best
Electric skillet
Two 8-inch porcelain tiles
Two 2-inch binder clips
Aluminum acetate (alum) - about 1 tablespoon per quart of warm water
A tub for soaking the papers
Small stones to elevate the tiles inside the skillet
Fresh flowers and leaves
An old bath towel for removing the hot tiles
Optional: a piece of plastic sheeting to prevent color from bleeding between layers
(Please use caution. The tiles are HOT as they come out of the skillet. And consider a mask when using the alum to avoid breathing the particles.)
Step 1 — Mordant Your Paper
Fill a tub with warm water and mix in about a tablespoon of alum per quart. Soak your watercolor paper in this solution for around 10 minutes.
The alum is a mordant. It helps the paper hold onto the color.
I like to keep my watercolor paper wet. The water creates that beautiful flow of color across the surface, where the pigment moves the way water does and bleeds softly toward the edges. Don't skip this step. It makes a real difference.
Step 2 — Set Up Your Skillet
Place your stones in the bottom of the skillet and add water. The stones are there to hold your tile stack up above the waterline. Heat to about 250 degrees. These papers are going to be steamed, not boiled. That matters. The water boils below, but the papers never touch it. They're cooked by steam and pressure from above.
Step 3 — Build Your Stack
Always start with a tile, smooth side up. The smooth side is what touches your paper, never the embossed side.
Here's how I layer it:
One piece of wet paper on the tile
My flowers or leaves arranged on top
A second piece of wet paper directly over the plants
More flowers or leaves.
The second tile on top, smooth side down
Binder clips on both sides to hold everything together
Snip off any stems that stick out past the edges
Each piece of paper in the stack will pick up a print and color from the plant material on either side of it.
The front and back of a leaf print differently — different colors, mirror images of each other. That's one of the things I love most about this process. You open it up and you have twice as many pieces as you expected.
Step 4 — Steam
Place your tile stack on the stones inside the skillet. Put the lid on. Heat to 250 degrees. Let the heat and steam do the work for 20-25 minutes. You might need a longer time in the skillet depending on your plants. Experiment and have fun.
The steam and pressure pulls the natural pigments out of the plants and releases them into the paper.
Step 5 — The Reveal
When time's up, lift the tile stack out and set it on your old towel. The tiles will be hot, so be careful. Gloves are a good idea.
Open it slowly.
What you'll find depends on the plants you used, how long you steamed, and a lot of other small things you can't entirely control.
That unpredictability is the most fun part of ecoprinting. The Japanese maple leaves I used in this video gave me blues and greens on one side, and different blues and greens on the other. The coreopsis bled through the paper and changed the paper next to it. I loved it. The way the water caught the color and moved to the edges of the page is the organic and can’t be repeated.
You get to decide which side you prefer. Sometimes both sides are beautiful. Sometimes one surprises you and becomes your favorite.
One of the reasons I've continued ecoprinting for years is that every bundle still surprises me. Even when I use the same flowers, no two prints are ever alike. That's what keeps this process interesting.
I’ve started using a vinegar bath after the prints are out of the skillet. The colors will last longer with a quick dip in a pan with 1-2 tbsp vinegar in a quart of water. Then hang to dry.
Not Sure Which Plants to Use?
That's the first question everyone asks, and it's the right one. Not every plant prints well, and the results vary by species, season, and growing conditions.
I put together a free guide — My Favorite Plants for Ecoprinting on Paper — with the flowers and leaves I reach for most here in Oklahoma, Zone 7. I've included what colors they give and why each one works.
Frequently Asked Questions About Ecoprint on Paper
What paper works best for ecoprinting?
Definitely watercolor paper. Use a heavy weight paper, 140lb preferably. Hot or cold press works. Hot press has a smoother surface.
Do I need an expensive steamer?
Not at all. A used electric skillet is an inexpensive way to create a closed, steamy environment for your ecoprinting on paper.
Why an electric skillet instead of a steamer on the stove?
I can set up my process in the garage by using an electric skillet. A steamer on the stovetop will work. It’s just a bigger mess in the kitchen.
Can I use dried leaves?
I would experiment with the leaves. Some may work after they have been soaked in water for a while. The outcome will be different than using fresh leaves.
Why didn't my leaves print?
There are many reasons for no color or pattern. The flowers or leaves can be too dry. Or there is not enough color to transfer like white daisies.
Experiment with what you have. I’ve found the flowers that give me the most color just by trying everything in my garden. Now I try to grow the coreopsis and cosmos that have proven to work best for me.
Check this list out for more of my tips on ecoprinting on paper.
Want to Skip Straight to Making Art?
If you love the look of ecoprinted paper but aren't ready to set up the skillet yet, I have something for you. I sell digital ecoprinted papers.
These are downloadable digital copies of my original ecoprints to use in your art journal, collage work, or mixed-media projects. You can print them on your home printer using 8-1/2x11 inch paper.
I hope this gives you a clear picture of how approachable this process really is. A yard sale skillet and a handful of flowers from the garden can give you something genuinely beautiful. I'd love to see what you make.
If you try it, come back and tell me which plants you used.
Subscribe to my YouTube channel so you don't miss what's coming next.
I’ve shared my entire ecoprinting on paper process with you.
If you have tried ecoprinting on paper or you want to know what you can do with those papers, I have a course just for that!
Embellished Ecoprints is my course. Learn more here.